


Skip to contentSkip to search
  1. Home>
  2. Articles>
  3. Get started with the student organisations portal

Get started with the student organisations portal

Here you can follow a step-by-step guide to creating a page for your student organisation, so you can increase your visibility and add events to the events calendar.

  • Portrett av Vilja Sofie Nystad, rådgiver i Sit
    Rådgiver
Published Updated
A man is sitting at a computer looking at the screen. In the background, two women are sitting on a sofa.
Get started with your student organisation page in just a few steps.

Get started with the student organisation pages

Would you like to add events to the events calendar or make your organisation visible on the student organisations page? First, you’ll need to create a page for your student organisation. Luckily, it’s easy to do. Just follow the steps below to get started.

Step 1: Create a personal account

To create a student organisation, you’ll first need a personal account. Here’s how:

  • Go to “My organisation page”
  • Select “Log in”
  • Select “Use another account” by clicking the plus symbol
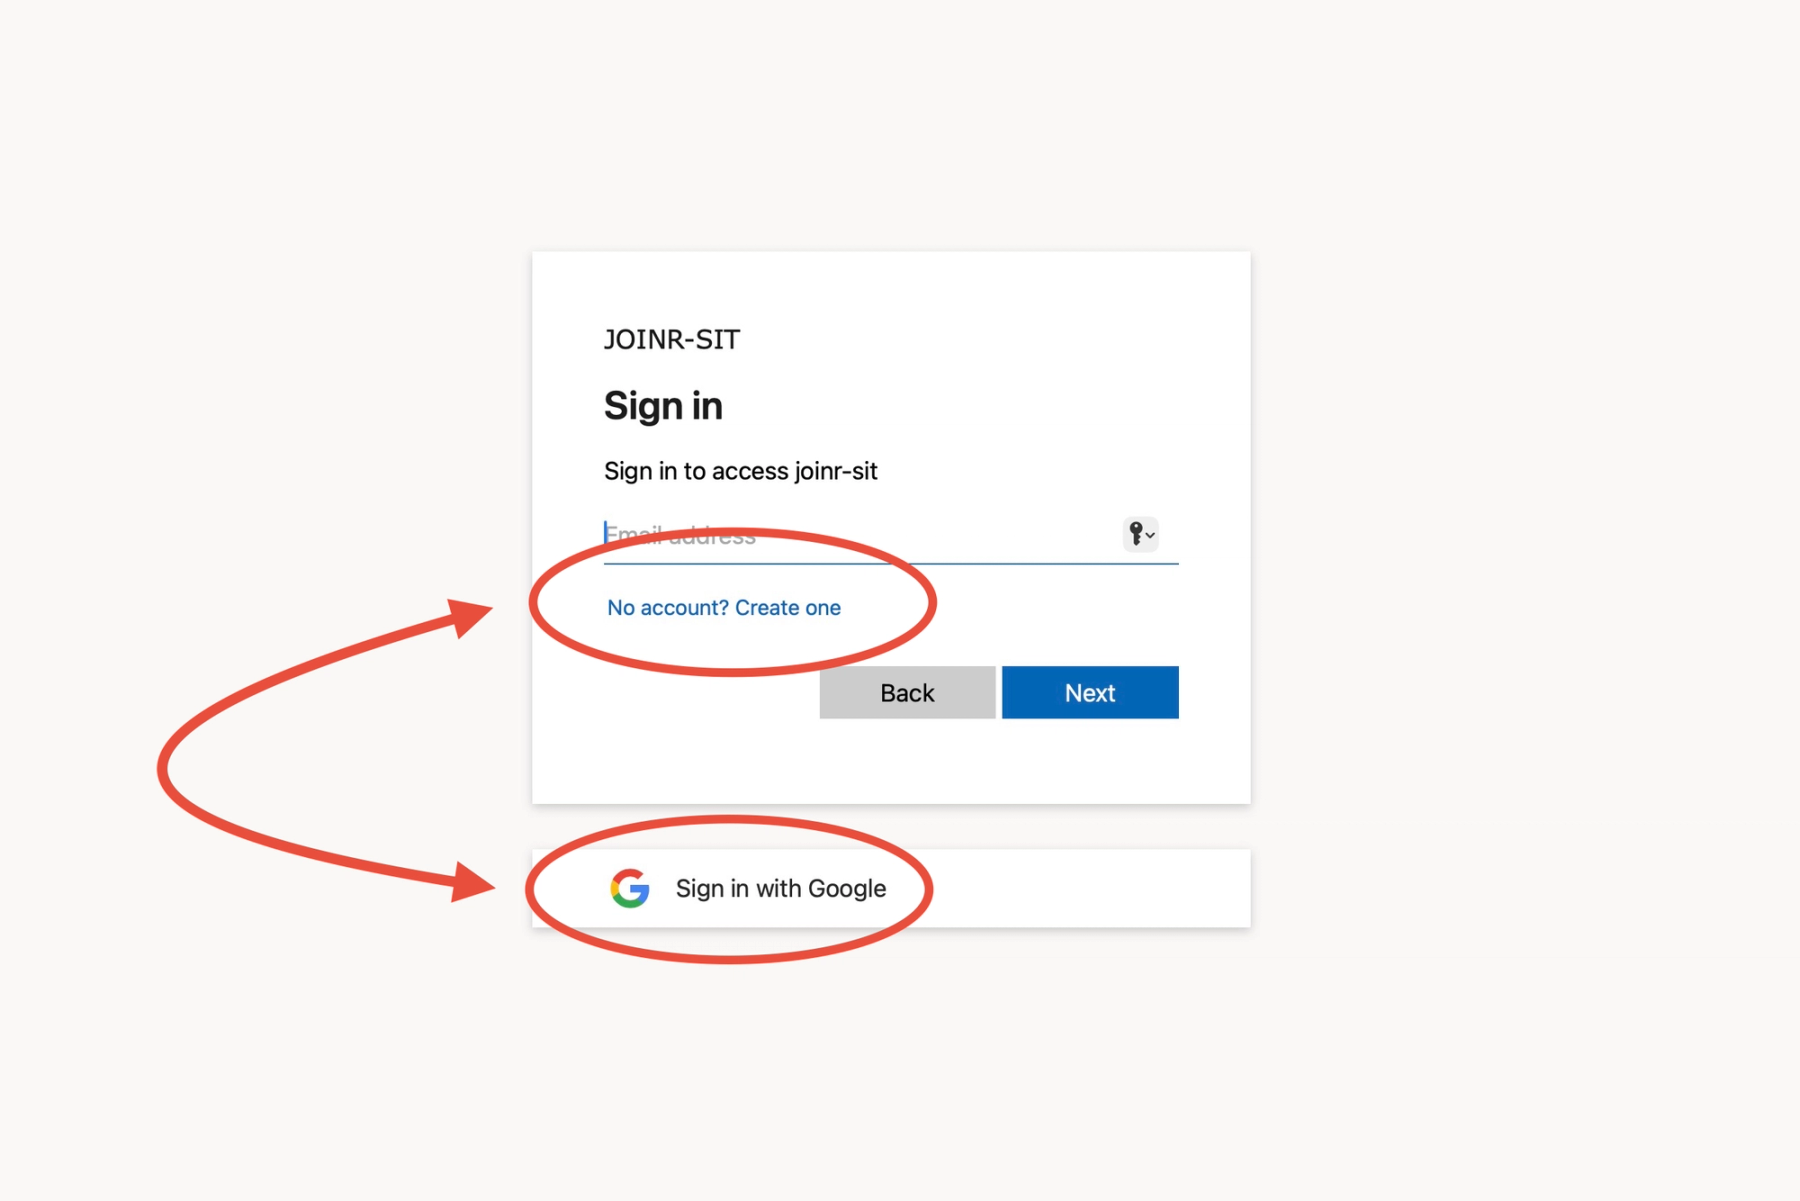
  • Select either “No account? Create one” or “Sign in with Google” (see image)

When creating your personal account, it’s important to use your personal email address. You can add your student organisation’s email address when you create the organisation in the next step.

Screenshot of a login page with arrows highlighting where you can create a new account or sign in with Google.
You can quickly create an account.

Step 2: Add your student organisation

Once your personal account is ready, you can create your student organisation. Here’s how:

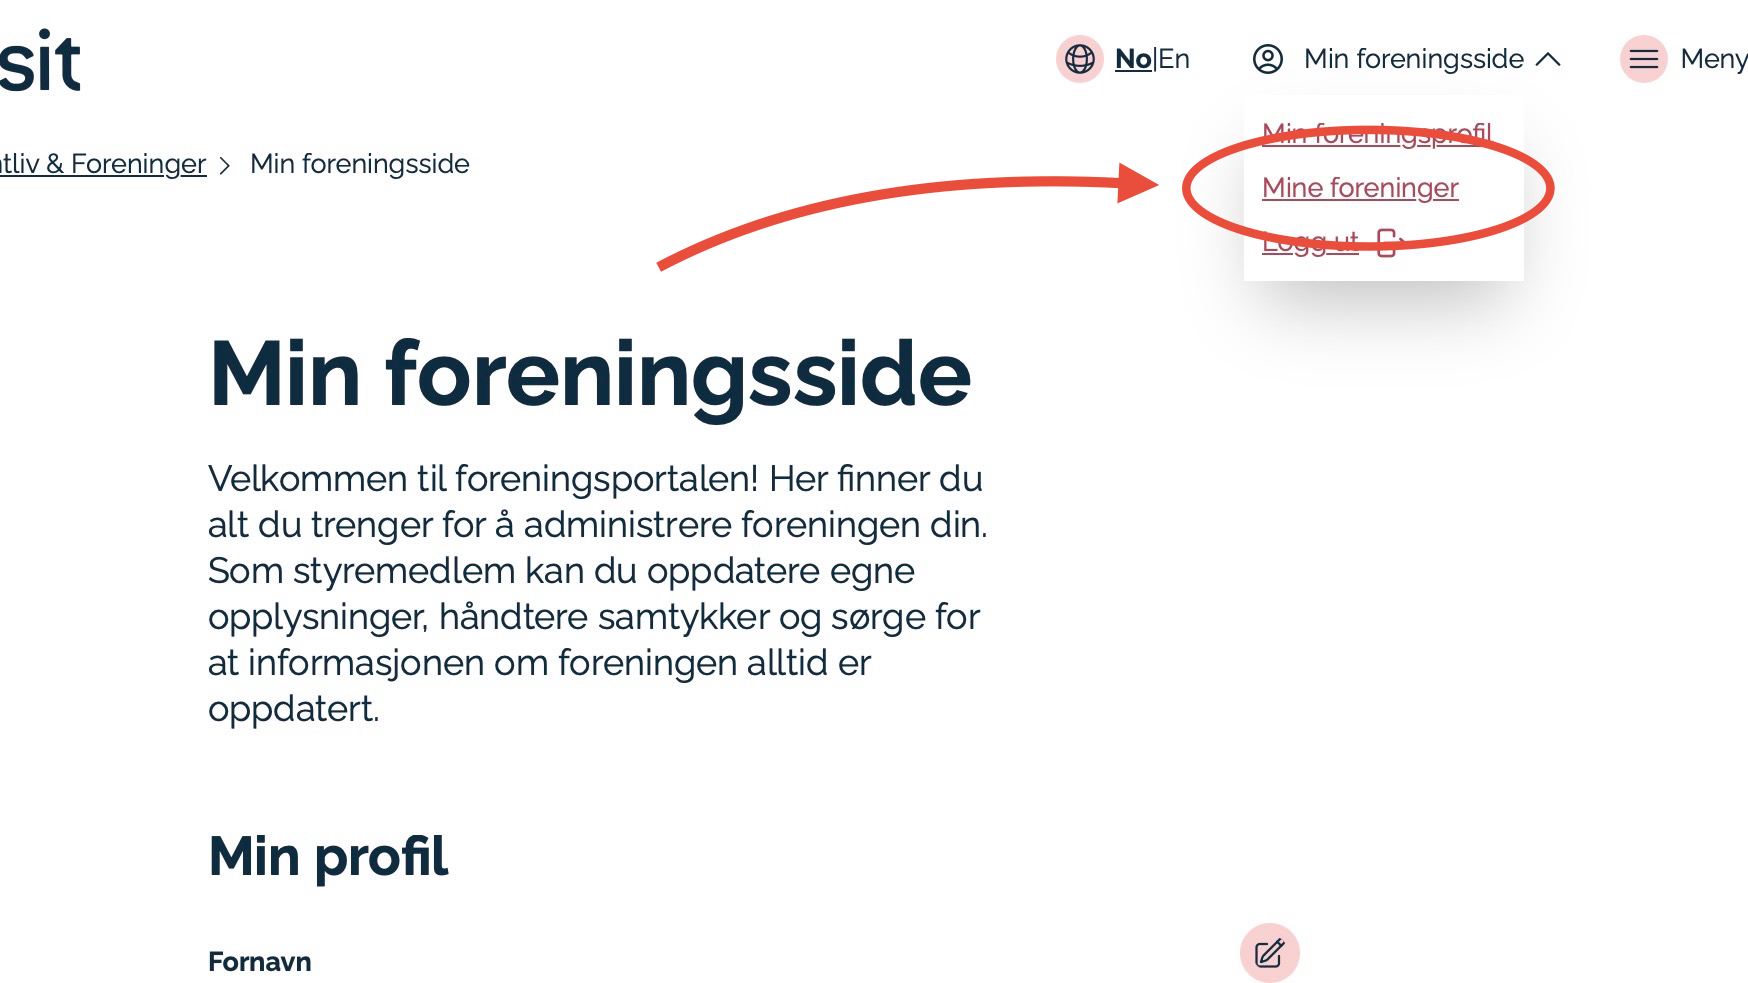
  • Go to “My organisation page” in the top right-hand corner and select “My organisations” (see image)
  • Select “Create organisation”
  • Enter the details about your organisation and submit the form

Please note: The person who creates the organisation should be a member of the board, as they will automatically be listed as the contact person.

Screenshot of the website with the “My organisation page” menu open in the top right-hand corner. “My organisations” is circled in red to show where to click to register a new student organisation.
Once you’ve created your personal profile, you can register your student organisation.

What happens after you’ve registered your student organisation?

Once you’ve registered your student organisation, it will usually be approved within one to two days. Once approved, your organisation will be visible on the student organisations page. However, as soon as you’ve submitted the form, you can:

  • add more board members
  • create and publish events in the events calendar
  • keep your organisation’s information up to date
  • apply for financial support

If you have any questions about registering your student organisation, please contact us at: forening@sit.no.